|
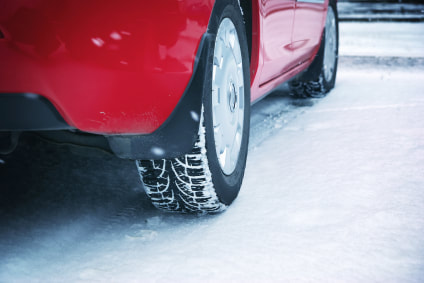
Hydroplaning occurs when a vehicle's tires lose contact with the road surface due to a layer of water coming between the tires and the road. This phenomenon reduces the driver's ability to control the vehicle, leading to potentially hazardous situations. 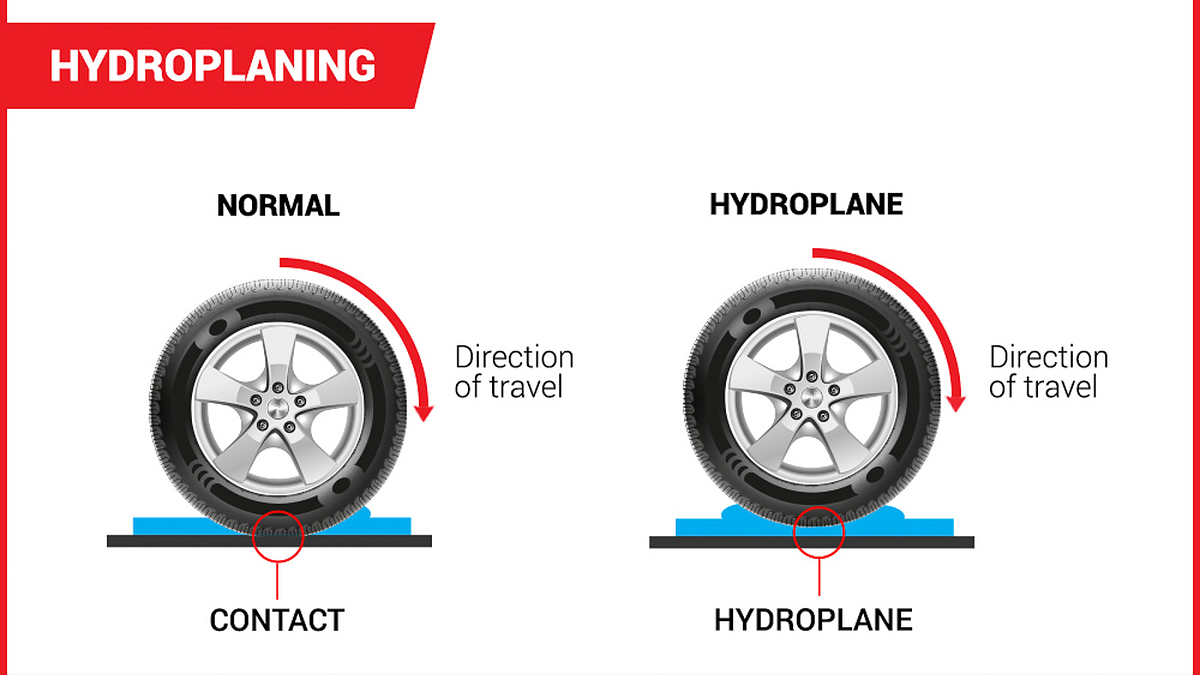 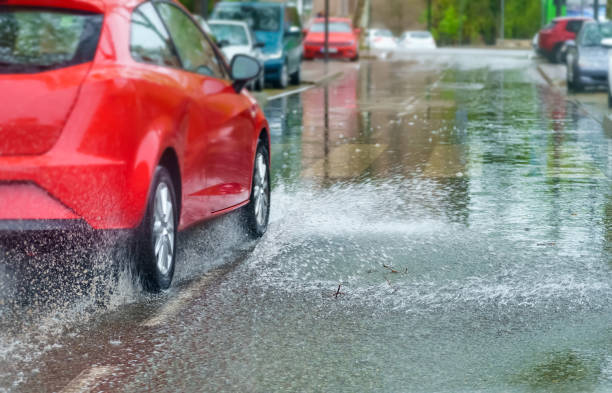 CausesWater Thickness: Hydroplaning typically happens in conditions where there is a thin layer of water on the road, reducing tire traction. Speed: Higher speeds increase the risk of hydroplaning. As speed rises, the tires may not be able to push water out of the way quickly enough, causing the vehicle to lose traction. Tire Tread Depth: Worn-out or bald tires are more prone to hydroplaning as they are less effective in dispersing water from the road surface. Road Conditions: Hydroplaning is more likely to occur in heavy rain, standing water, or in areas where water drainage is poor. Recognizing HydroplaningLoss of Steering Response: If the steering feels light or unresponsive, it may indicate hydroplaning. Unusual Noises: Drivers may hear a splashing or hissing sound as the tires skim the water. Reduced Traction: A sudden decrease in traction can be felt through the steering wheel. Prevention and Safety TipsReduce Speed: Slow down in wet or rainy conditions to reduce the risk of hydroplaning. Maintain Tires: Ensure proper tire maintenance, including regular rotation, balance, and checking for adequate tread depth. Avoid Cruise Control: Turn off cruise control in wet conditions to maintain better control over the vehicle. Drive in Tracks: Follow the tire tracks of the vehicle ahead, as they may have already pushed water off the road. Stay Away from Puddles: Avoid driving through large puddles, as they can increase the risk of hydroplaning. Brake Carefully: If hydroplaning occurs, avoid sudden movements, and gently ease off the accelerator. Do not slam on the brakes, as this can lead to skidding. Steer Straight: Keep the steering wheel straight when hydroplaning to regain control. ConclusionHydroplaning is a serious safety concern, but with awareness and proper precautions, drivers can reduce the risk and ensure safer journeys in wet conditions. Regular vehicle maintenance, cautious driving, and adherence to safety guidelines are crucial for preventing hydroplaning incidents.
0 Comments
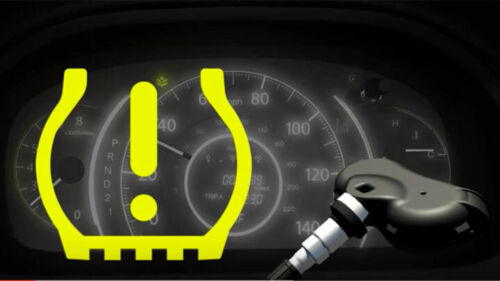
Why is the TPMS Sensor Light On?1. Low Tire Pressure: The most common reason for the TPMS sensor light to illuminate is low tire pressure. When a tire is underinflated, it can affect the vehicle's handling, fuel efficiency, and overall safety. 2. Wheel Swapping: Sometimes, when you swap your vehicle's wheels or tires, the TPMS sensors might not sync correctly with the new setup. This discrepancy can trigger the sensor light to come on. 3. Improper Sensor Mounting: If the TPMS sensors were not properly mated to the vehicle during installation or maintenance, it can also cause the sensor light to illuminate. Correct pairing is crucial for accurate tire pressure monitoring. How to Resolve TPMS Sensor Light Issues:1. Check Tire Pressure: Start by manually checking the tire pressure of all four tires using a reliable tire pressure gauge. Inflate the tires to the manufacturer-recommended pressure, which you can find in the owner's manual or on a sticker inside the driver's side door jamb. 2. Drive to Reset: After inflating the tires to the correct pressure, drive the vehicle for approximately 25 kilometers (or about 25km). The TPMS system will likely reset itself during this drive, and the sensor light should turn off if the tire pressure is within the acceptable range. 3. Visit a Garage: If the TPMS sensor light remains on after proper tire inflation and driving, it's advisable to visit a trusted automotive garage. A professional mechanic can reset the TPMS system and ensure that the sensors are correctly mated to your vehicle. 4. Sensor Recalibration: During a visit to the garage, the technician can reset the TPMS sensors to match your current wheel configuration. This ensures that the sensors accurately monitor the tire pressure and communicate it to your vehicle's system. Preventing Future TPMS Sensor Light Issues:1. Proper Tire Maintenance:
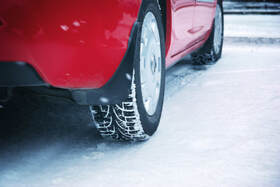
Regularly check and maintain your tire pressure according to the manufacturer's recommendations. This will help prevent the TPMS sensor light from coming on due to low tire pressure. 2. Ensure Proper Sensor Installation: When swapping wheels or installing new tires, make sure the TPMS sensors are properly installed and mated to the vehicle to avoid sensor light issues after each seasonal tire swap. In conclusion, addressing a TPMS sensor light promptly is crucial for your safety and the overall performance of your vehicle. By following the steps mentioned above and staying proactive with your tire maintenance, you can ensure a smooth and safe driving experience. If you encounter persistent issues with the TPMS sensor light, consulting a dealership or garage is always a wise decision to ensure your vehicle's systems are functioning optimally. Ah, winter in Canada - a season filled with picturesque snowscapes, hot cocoa, and the occasional snowball fight. But let's be real, it's also a season of treacherous roads, icy winds, and a test of your vehicle's mettle. So, if you want to navigate the winter wonderland with confidence and a touch of style, it's time to get your ride winter-ready! Buckle up, because we're about to drop some cool tips that will make your winter driving experience a breeze. 1. Tires: The Grip to Rule Them All
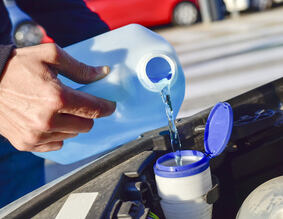
2. Fluids: Keep 'Em Flowing
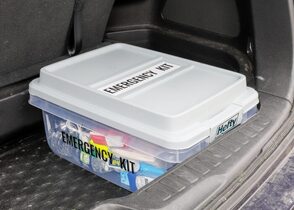
3. Survival Kit: Be Prepared, Not Scared
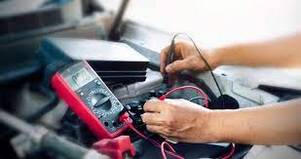
4. Battery Check: Don't Let the Cold Drain You
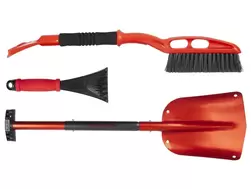
5. Snow Brush & Shovel: Unearth the Essentials
So, there you have it – your ultimate guide to getting your vehicle ready for winter. With the right preparations, you'll be cruising through snowy streets with confidence, knowing you've got the smarts and wit to handle whatever Mother Nature throws your way.
Tire storage may not be the most popular choice of conversation at the dinner table, but did you know that storing your tires incorrectly could lead to rapid tire and rim deterioration? Here are a few storage solutions to help stretch the lifespan of your tires. Storing Your Tires in Your Shed?
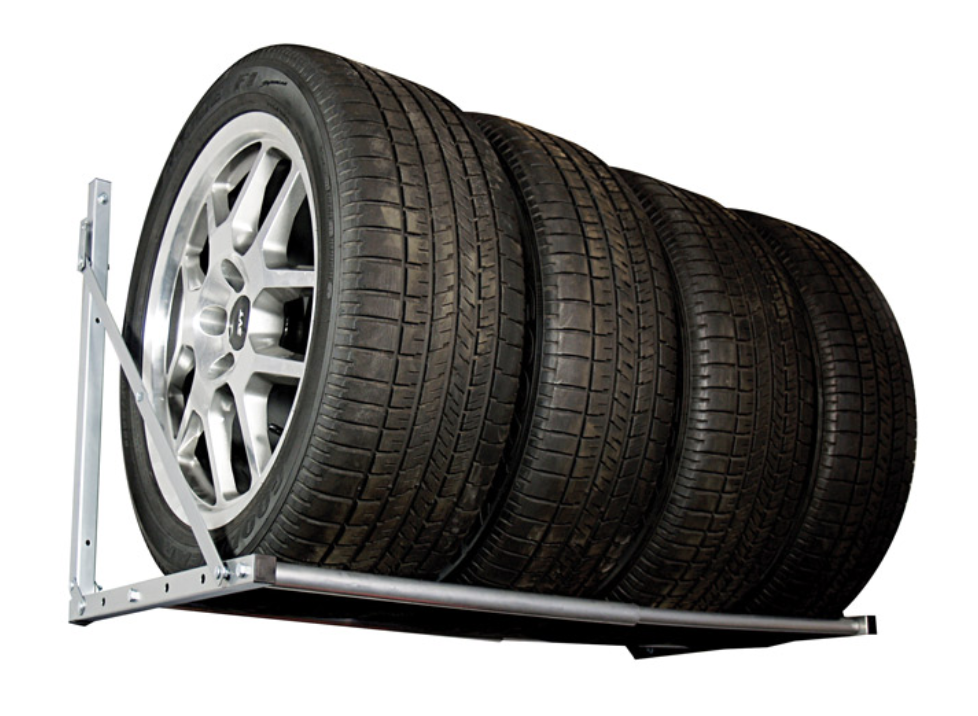
Storing Tires Along the Outside of Your House?
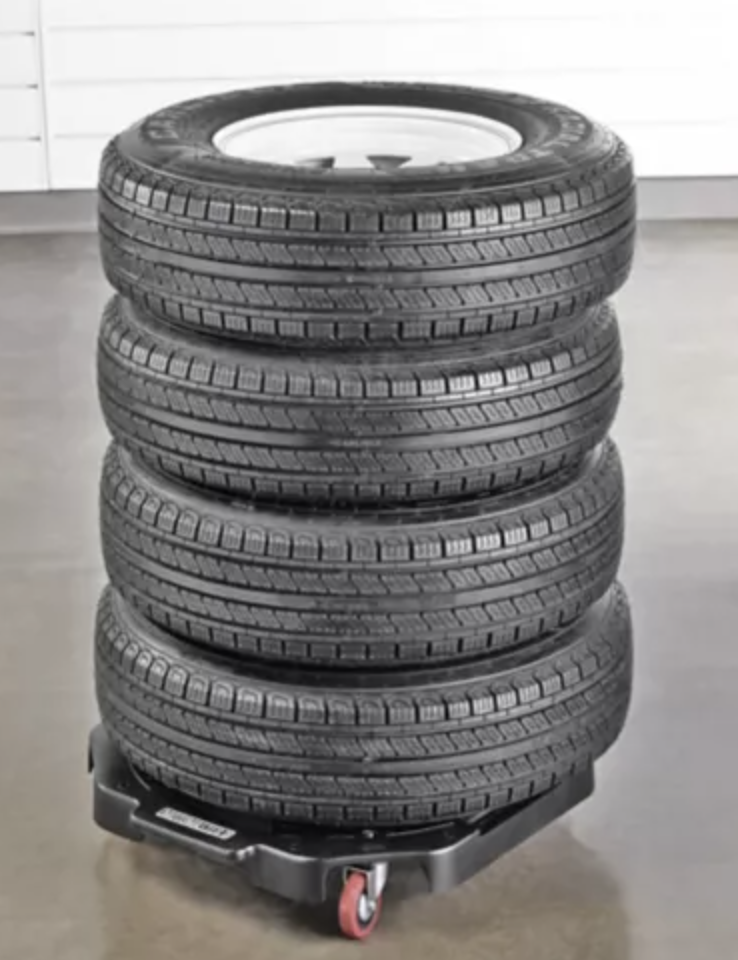
Storing Your Tires in Your Garage?
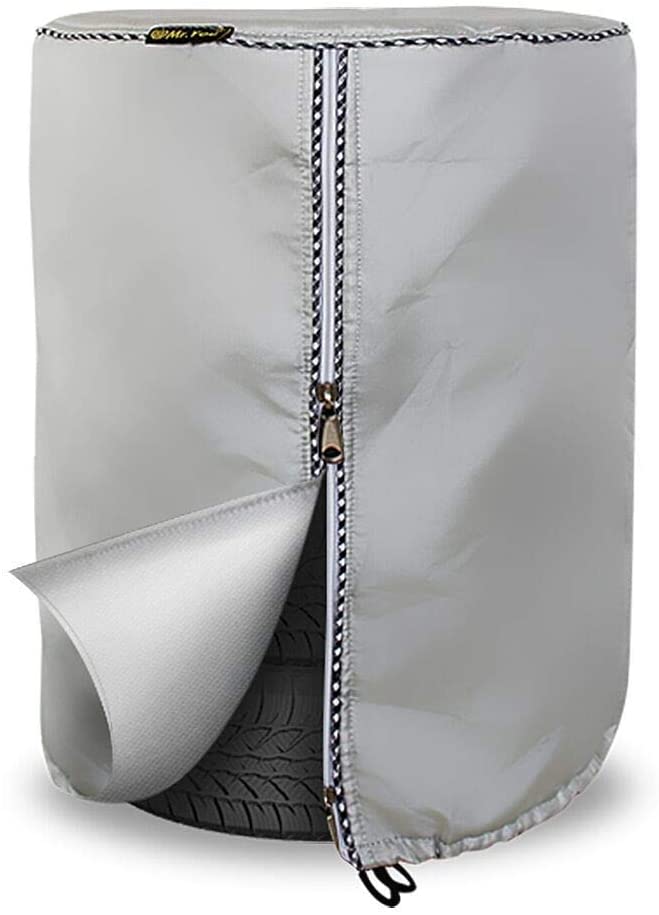
TIRE BAGS : YAY OR NAY?
 Canadian winters can be harsh and at times dangerous. We all know that having winter tires on is a great way to ensure some extra safety and traction while driving in unpredictable conditions.
Did You Know? In 2016, the Ontario government created a new rule that pushed insurance companies in the province to provide a discount to drivers who buy and install winter tires. This discount is not just about saving money, but more about reducing potential danger on our roads. By having winter tires on your vehicle, both yourself and the insurance company benefit. That is why insurance companies offer a 5% discount if your vehicle is equipped with winter tires. Here’s How: To take advantage of this discount, call your insurance company and ask for the following details:
More Information: Visit Ontario.ca for more information!
|
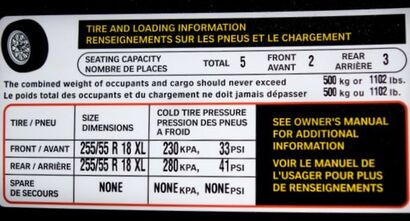 DOOR PANEL STICKER: | 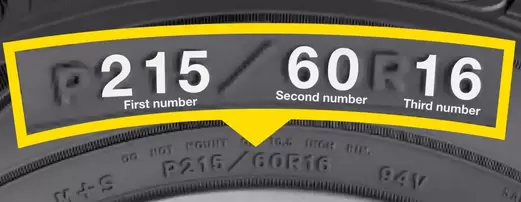 *note: this image does not reflect the given example and is only for reference |
In this example, we can see that the tire size is 255/55R18.
The first number, 255, is the measurement in millimeters taken from the outside of the outer wall to the outside of the inner wall of the tire. To better understand where this measurement is taken from, imagine cutting the tire in half and measure from the fattest points of the rubber.
The 55 is the aspect ratio of the tire given as a percentage. It is the sidewall height (from the bead where the tire seats on the rim to the tread surface) as a percentage of the tire width.
The last number, 18, is the diameter of the rim in inches.
Once you are familiar with these measurements, you can begin your search. Any tire for sale that has a dimension bigger or smaller than the one shown on your vehicle should be checked by your dealership to ensure the percent differential is within the 3% allowance mark.
Condition:
Once you have mastered down the understanding of the correct tire size for your vehicle, you can begin searching online. The quality of the tires is very important when buying used compared to new. Don’t be shy to ask the seller to send you photos of each tire each side of the tires. You may also ask for some close up photos to see if there is any cracking happening in the rubber. Taking this step can save you a lot of time.
What to look for:
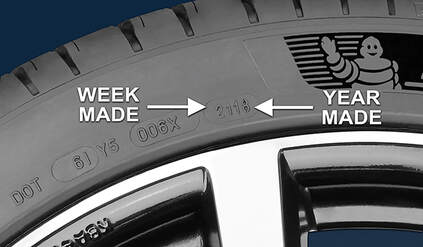
1- The “DOT” marking on the tire is the week and year the tire was manufactured. Try to buy tires that are less than 5 years old to ensure the rubber has not deteriorated.
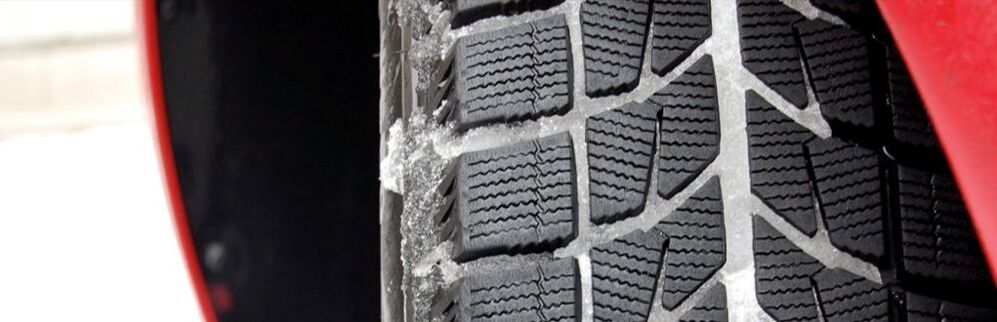
2- Inspect the tire tread depth on all 4 tires. Do they meet the requirement? Click here to read more about tire tread depth.
3- Outer and inner wall should have no deep scratches or bulges. Also, try pinching or pushing at the rubber, there should be no signs of micro cracks. Check for any patches or plugs. A punctured tire may not last as long as a fully intact tire.
4- Make sure your tires are a matching set. They should be the same size (width and aspect ratio) and have similar tread wear and a similar tread pattern.
Tips:
Always maintain the recommended tire pressure (indicated on the sticker located on the inside of the driver side door panel).
Ask your tire technician to rotate your tires in pairs. The two front tires change place with the pair in the back. This ensures tread depth is balanced on the axel.
Tires should not be stored outside in the sun. The UV’s accelerate the deterioration of the rubber. Store in your garage or shed.
Don’t be shy to call an expert to ask simple questions. It could save you!
Typically, summer tires should be installed on your vehicle when temperatures are hovering at 7 degrees celsius. Because summer tires are made of a harder rubber than winter tires, they perform differently in different temperature conditions.
Many drivers may not know that summer tires need just as much tread depth attention as their winter tires do. In our climate we sometimes use our summer tires longer than our winter tires, so the wear and tear can take a toll on them.
It is also important to check the tire tread depth. Good tread depth is important in summer conditions. Gripping the road and eliminating the chances of hydroplaning in wet weather are the main reasons good tread depth is important.
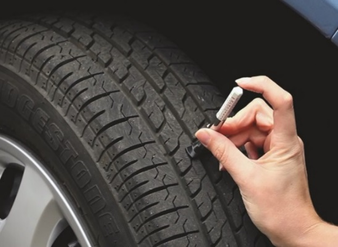 A tread depth gauge or a simple quarter can be used to check this: 5mm - tire tread depth is good 3mm - tire tread is low and needs replacing very soon 1.5 mm - tire tread depth is too low and needs to be replaced | 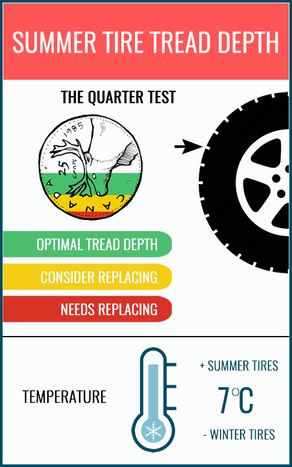 |
Be sure to check your tires for cracks or bulges on the side walls. If anything looks abnormal, it is best to take your tires to a garage to have them repaired or replaced. You can also ask your Tire Changers technician about your tire’s condition.
If your tires do need replacing, there are many places throughout the city you can take them to to have them recycled.
If your tires do need replacing, there are many places throughout the city you can take them to to have them recycled.
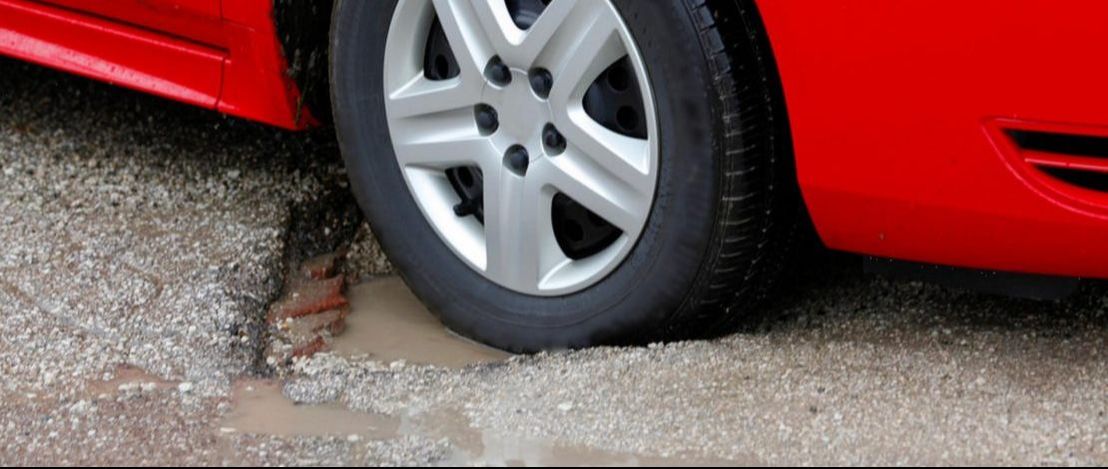
Spring driving unfortunately means dodging or hitting potholes. Running into one could be damaging to your tire and rim. Here are some key points to follow to lessen your chances of damaging your precious vehicle:
1. Keep your tire air pressure topped up. Hitting a pothole with low tire pressure can lead to rim damage and will likely become a costly repair.
2. Two hands on the wheel. We have the most control of our vehicle when our hands are placed at 9 and 3 on our steering wheels. If a pothole is approaching and it is safe to steer around it, this position will give you the most control while steering around it.
3. Slow down and do not tailgate. Keep enough distance from the car ahead of you so you can have clear view of what’s to come on the road. Tailgating is dangerous as it is and adding potholes in the spring just adds to the potential damage you can do to yourself and vehicle.
4. If you’re going to hit a pothole, make sure you get off the breaks just before you hit one. This will reduce the pressure on the front suspension and allow the suspension to do its job when absorbing the impact from the pothole.
5. Report potholes. The city of Ottawa has an easy online system for the public to use to report potholes on the road. You can also call 3-1-1 or 613-580-2400. The information you submit can save others the headache of hitting dangerous potholes.
Check for Damages
The tires. It is important to have your tires filled with air to the proper specifications. If not, hitting a pothole could mean damaging the tire and rim Check for bulges along the sidewall of the tire and check for any tread tears. Having a damaged tire can lead to many problems and can be very dangerous.
The rims. Hitting a pothole hard could lead to bends, cracks or chips on the rims. Always check the rims very carefully because even a hairline crack may mean your rim is no longer safe for driving on.
Alignment and suspension. The suspension is there to absorb any impact the vehicle runs through. After hitting a pothole, the suspension and alignment can be thrown off. If you begin to feel vibration and/or pulling to one side while driving, best to take your car to a garage to have it checked out.
The body. Going over a large pothole can sometimes scrape the underside of the vehicle. Check to see if the exhaust, side skirts and bumper are still intact. A short visit to the garage may be a good idea if you suspect damage was done.
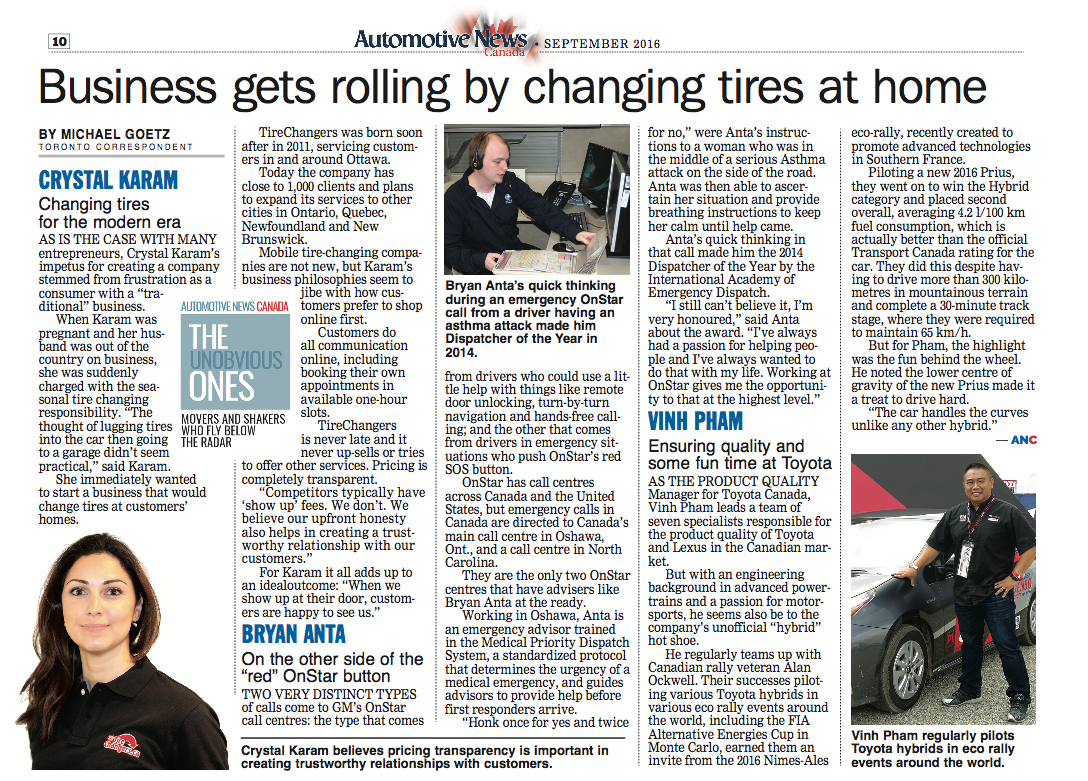
Tire Changers and owner Crystal Karam were featured in Septembers Automotive News - "The Unobvious Ones".
Stay Informed
If you want to ride the highway of knowledge about vehicle maintenance and awesome car tips, make sure to buckle up and follow our blog. We're your pit stop for all things automotive wisdom, so hop on the info lane and let's fuel up your automotive know-how together! 🚗💨
Archives
February 2024
September 2023
February 2021
September 2020
March 2020
March 2019
February 2018
October 2016
April 2016
April 2015
September 2014
November 2013
October 2012
September 2012
April 2012
February 2012
December 2011
November 2011